| |
These instructions assume you are using a USB QIKtest as pictured below.
If you are using a Serial QIKtest, or if your QIK Test does not look
like this, please click
here.
-
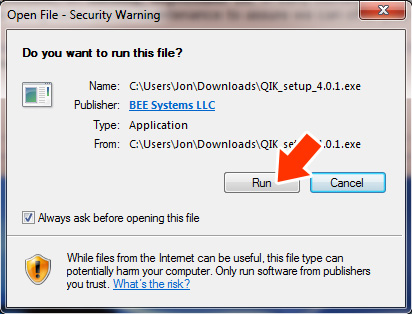
Run the QIK install file. If you are savvy enough
do the installation without instructions, skip to
step 9 now.
-
Click on Run
- Select Language
Click OK

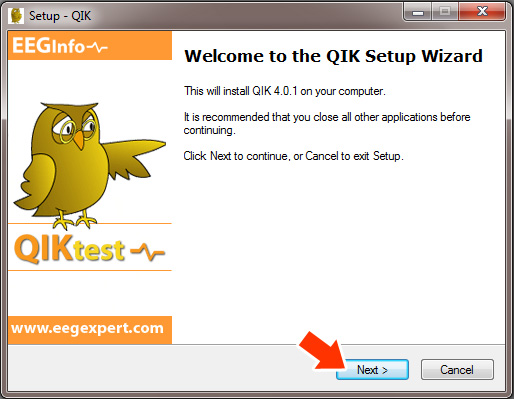
- Click Next
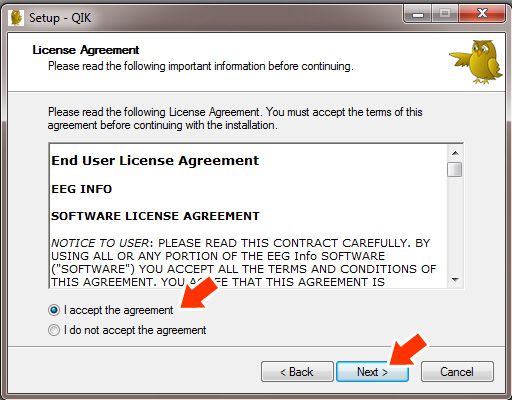
- Click on "I accept the agreement"
Click on Next
- Click on Next
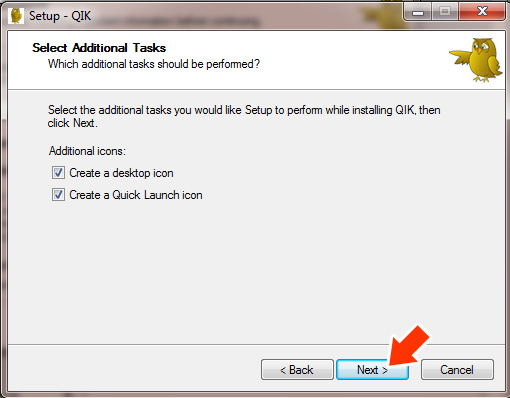
- Click Install
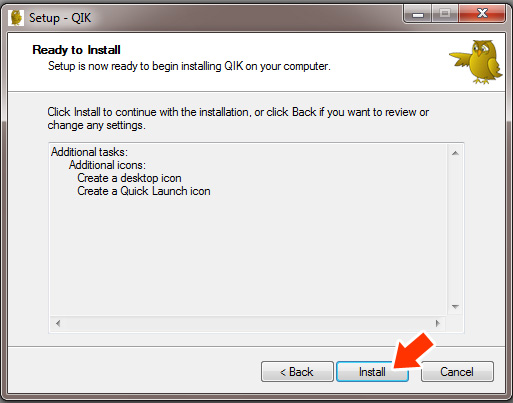
- Click Finish

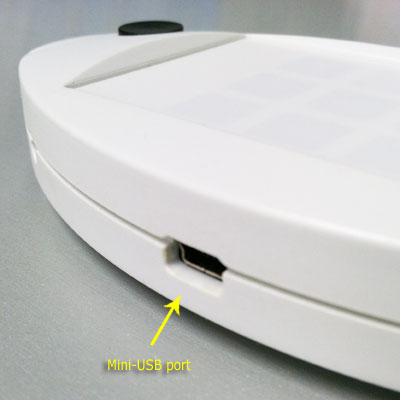
- Conect USB QIK Test to computer using USB Cable.
Please note the "greyed out" boxes indicate that a USB QIK
test is not detected and/or connected.
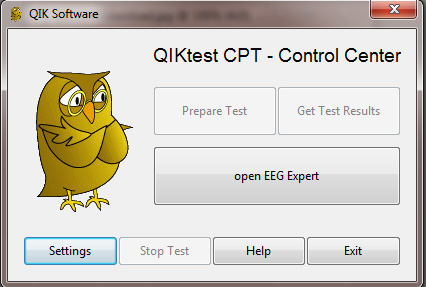
- When a USB QIK Test is connected properly, all buttons will show normally
and NOT greyed out as in the above photo.
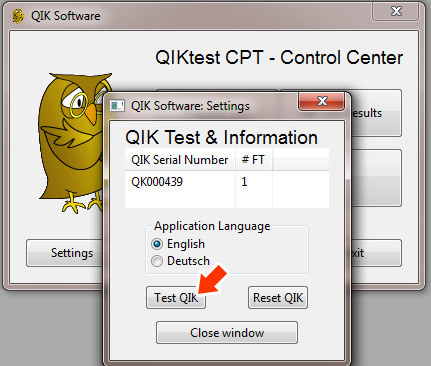
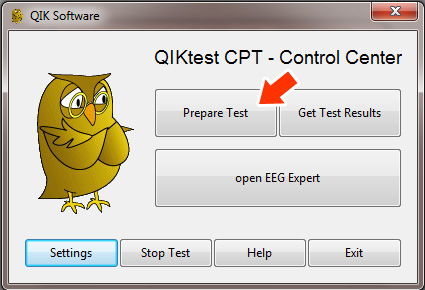
Click on Settings
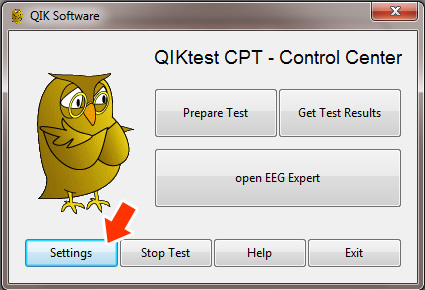
- Click on "Test QIK".
The QIK device should beep once.
This step is simply to test that the QIK device is connected properly
and responding. This step only needs to be performed the first time
you connect your QIK Test to your computer.
Cick "Close window" once test is complete.
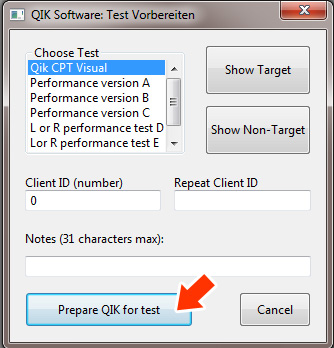
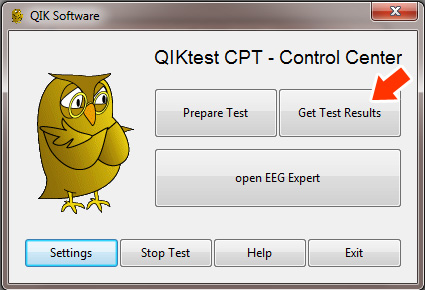
- Click on Prepare Test
- Choose the appropriate QIK Test. QIK CPT Visual is the main test
that you will use and is the default selection.
Enter Client ID and repeat (Must be a number. Do not use letters or
any other charachters other than numbers.).
- Practice Test:
A two-minute practice test is administered before the full CPT to assure
that the subject understands the test and how it is scored. The complete
practice test should be used before testing a subject for the first
time.
Before you click on "Prepare QIK for
test", use the "Show Target" and "Show Non-Target"
buttons to show test subject an example of what they will be looking
at as described below.
Sample Instructions to share with test subject:
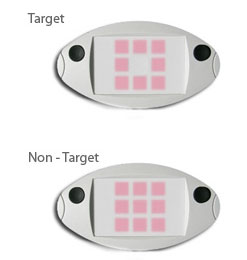 "This
is a test of attention. Two different patterns will flash on the QIK
device. Either all the lights will flash on like this (click on show
non-target), or just a circle of lights with a hole in the center like
this (click on show target). When the circle of lights flashes on, like
this (show target), I want you to press either one of these buttons
as fast as you can. Press only one button and press it down just once
for each target. When all the lights flash on like this (show non-target),
then you don't press either button. "This
is a test of attention. Two different patterns will flash on the QIK
device. Either all the lights will flash on like this (click on show
non-target), or just a circle of lights with a hole in the center like
this (click on show target). When the circle of lights flashes on, like
this (show target), I want you to press either one of these buttons
as fast as you can. Press only one button and press it down just once
for each target. When all the lights flash on like this (show non-target),
then you don't press either button.
Now hold the QIKtest in your hands with your thumbs resting lightly
on the buttons. The lights are going to flash and your job is to press
either button as fast as you can each time you see the circle with the
hole in the center. Remember only press one of the buttons and not both.
You don't press the button when all the lights flash on. You want to
be as fast as you can, but also as careful as you can not to press the
button at the wrong time.
First you are going to do a practice test for a couple minutes to warm
up. Press either button to wake up the QIK Test device, then press both
buttons at the same time, and hold down for one second. Three center
lights will count down to the start of the test. Remember; be as fast
and accurate as you can. "
- Click on "Do the Practice Test"
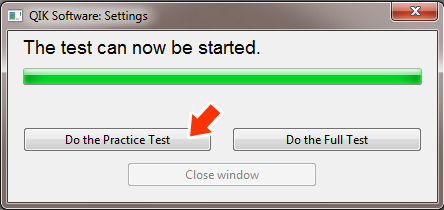
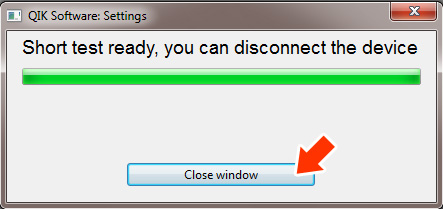
- You will receive the prompt pictured below, indicating that you can
disconnect the device at this point to hand to your test subject. You
do not have to disconnect, but it is now your option to do so.
Click "Close window"
- Once subject has completed the 2 minute test, as described in step
14 above, reconnect the QIK Test to USB cable and your PC.
Click on "Get Test Results"
- You will now see the results window for the brief 2 minute practice
test.
Use this opportunity to observe and correct the test subject to make
sure they are conducting the test properly.
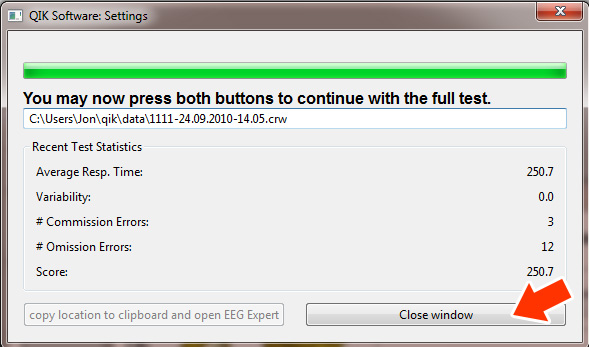
Click on "Close window"
- You may now detach your QIK Test again and give it back to the test
subject so they may take the full 20 minute CPT test. Make sure that
the test subject is in a comfortable place without distraction, as they
will be there for 20 minutes.
You do NOT need to click on "Prepare Test" again as both the
short 2 minute test and the 20 minute test are loaded at the same time.
- Press either button to wake up the QIK Test
device.
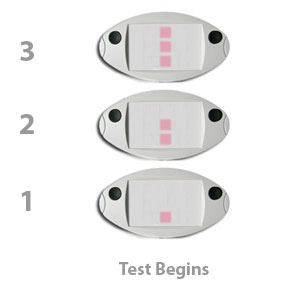
Press both buttons at the same time and
hold down for one second to begin the full 20 minute CPT. You will see
the 3,2,1 countdown and then the test will begin.
- Conect USB QIK Test to computer using USB Cable.
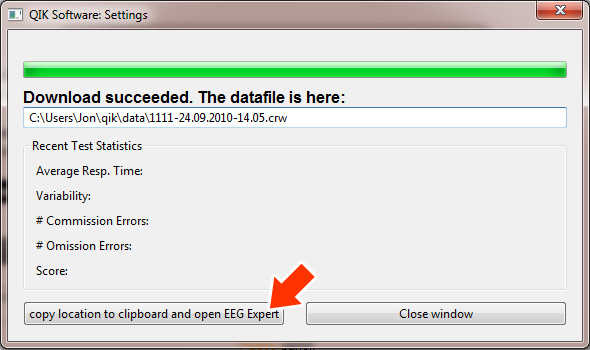
Click on "Get Test Results"
- Click on "copy location to clipboard and open EEG Expert"
This will automatically copy the disk location of the test data file
and open the EEG Expert website. You will later paste that disk location
to the EEG Expert website in the next step.
- Congratulations! You have completed the administration of the QIK
Test. Your not quite done yet. Please proceed to EEG
Expert Instructions, to upload and score the test online.

|
|